Level 1
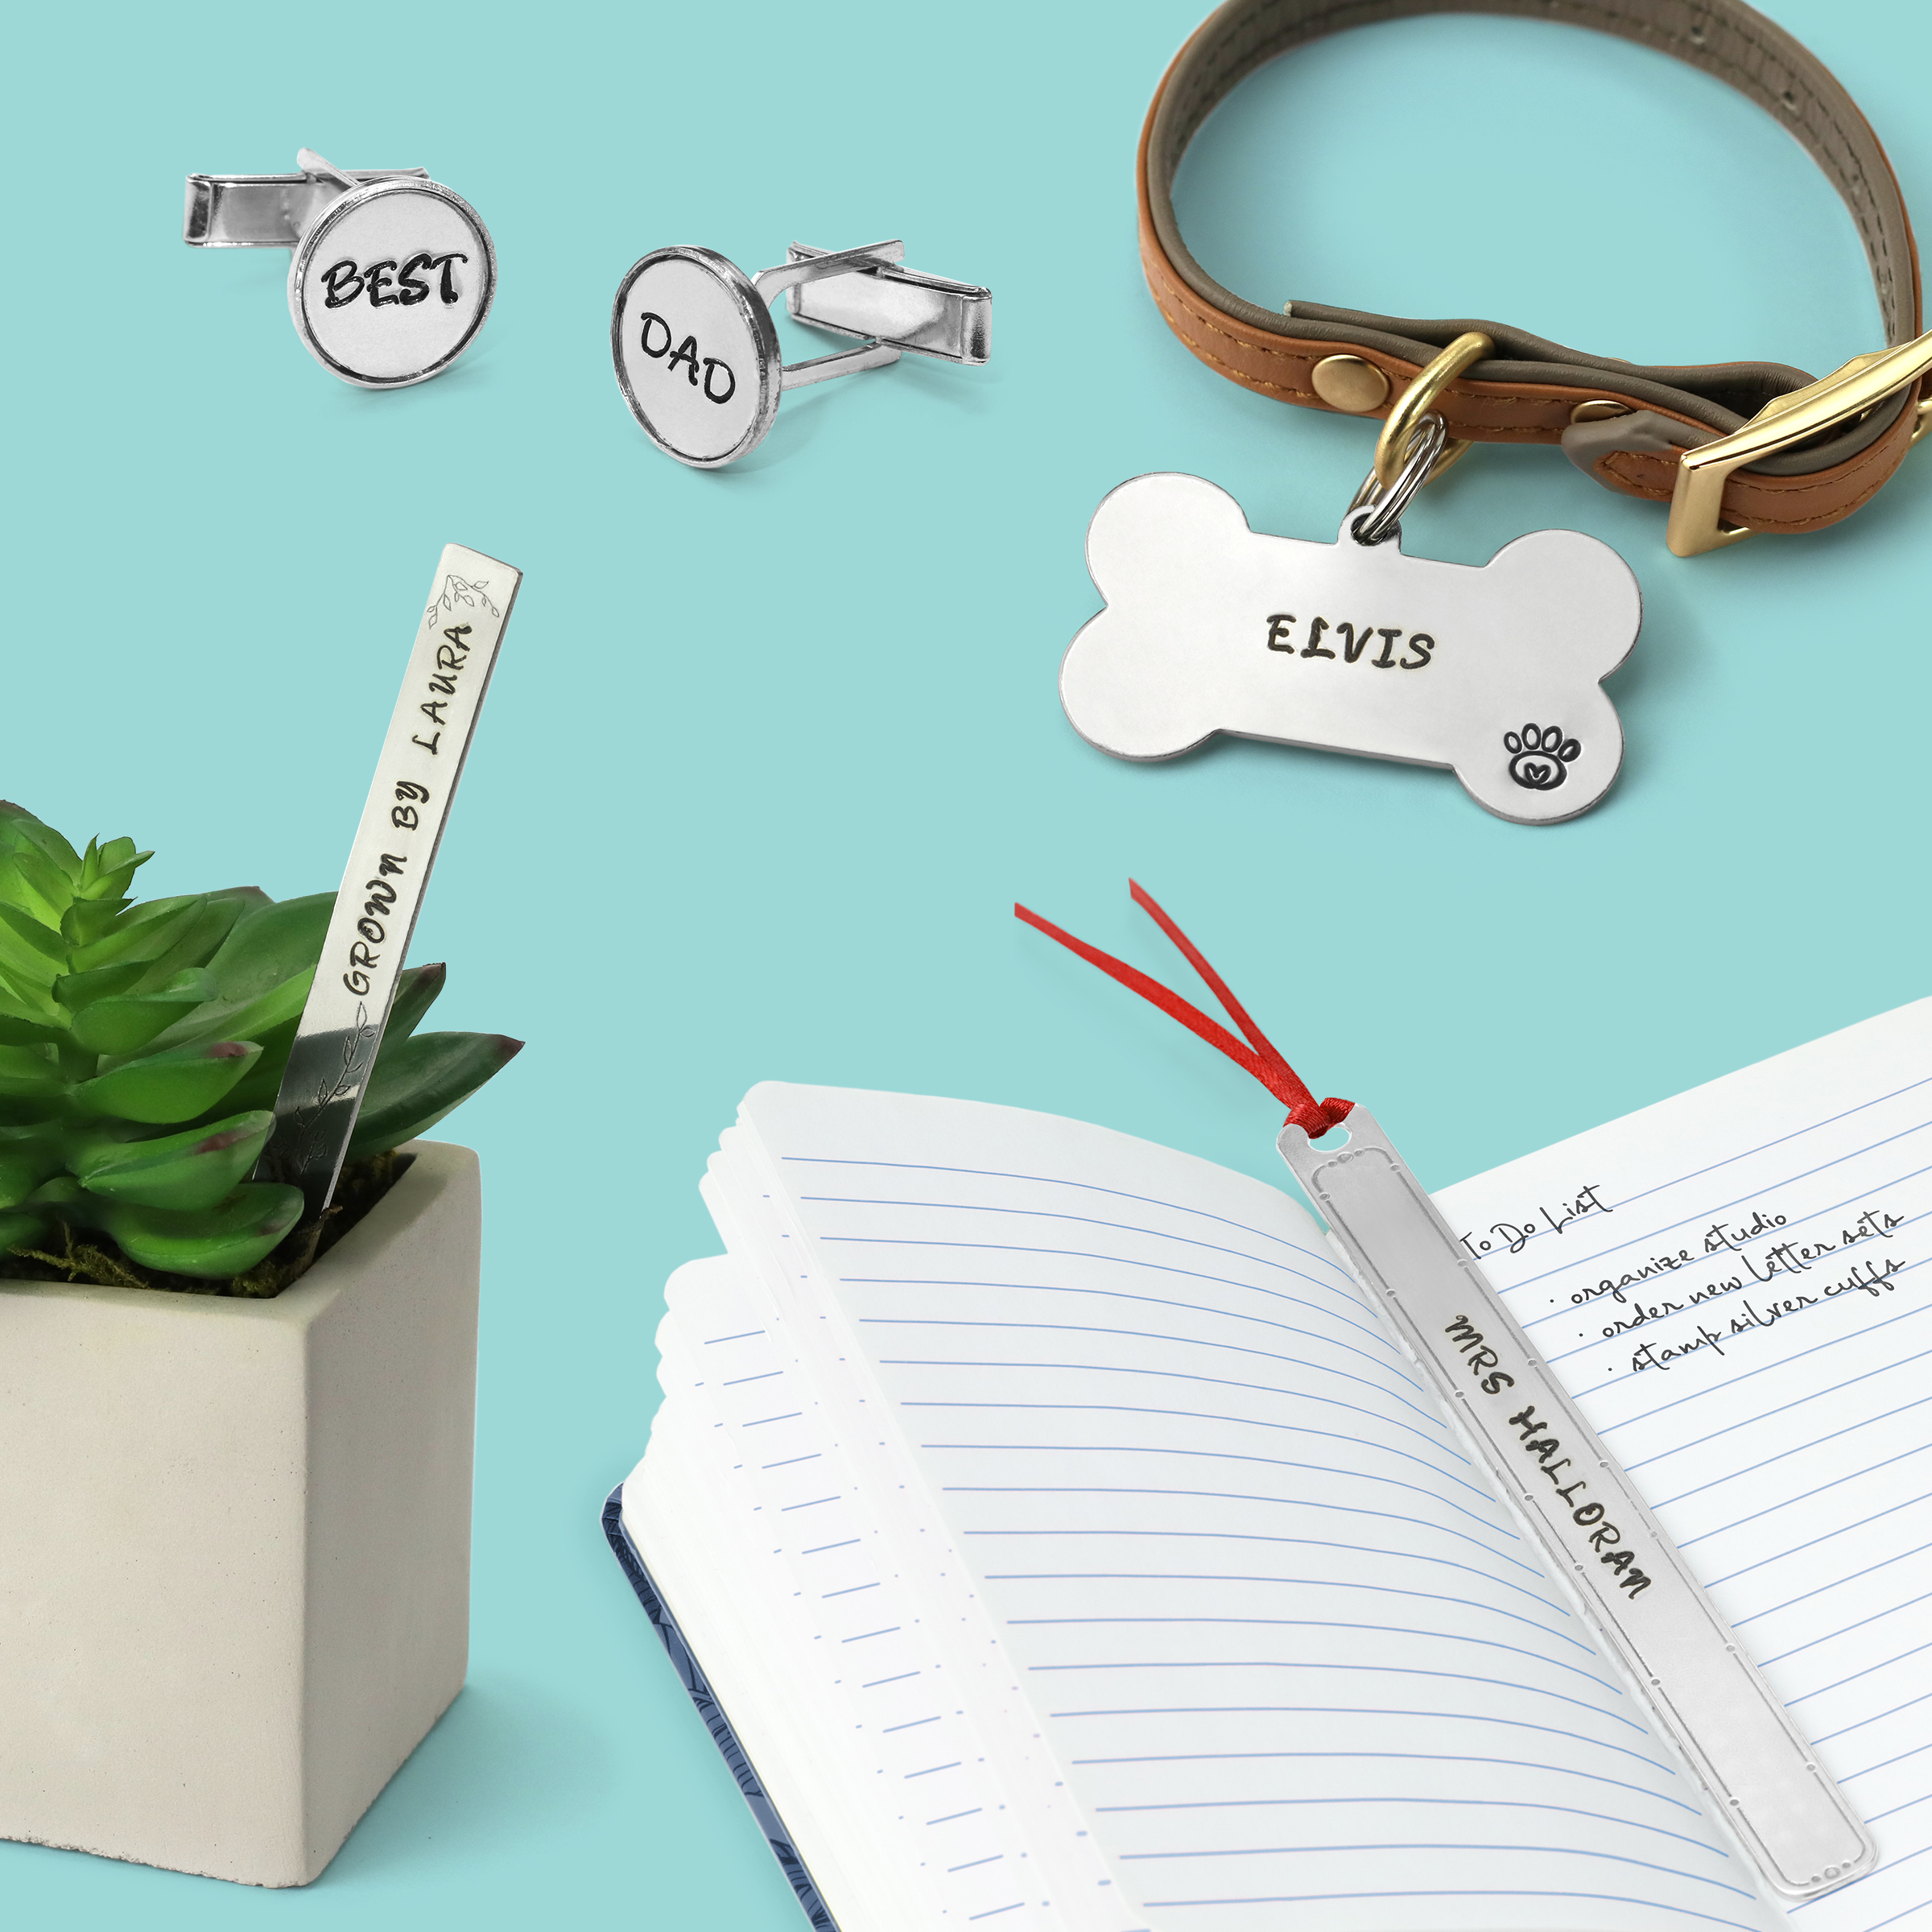
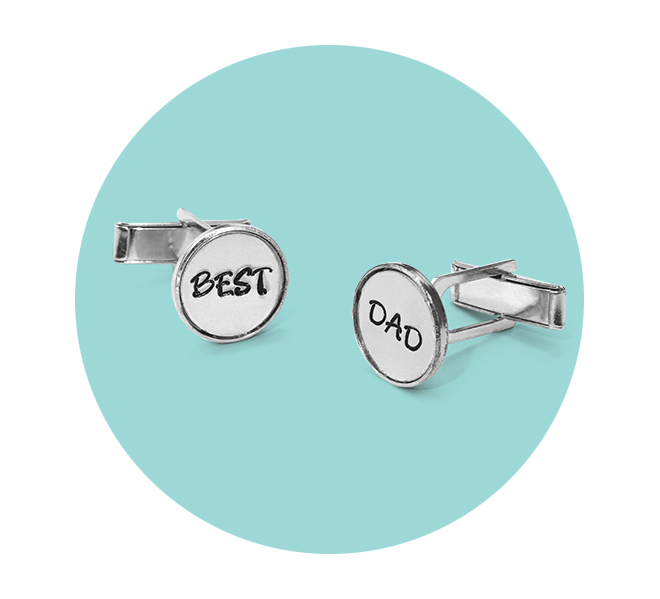
Best Gift Giver
Step 1
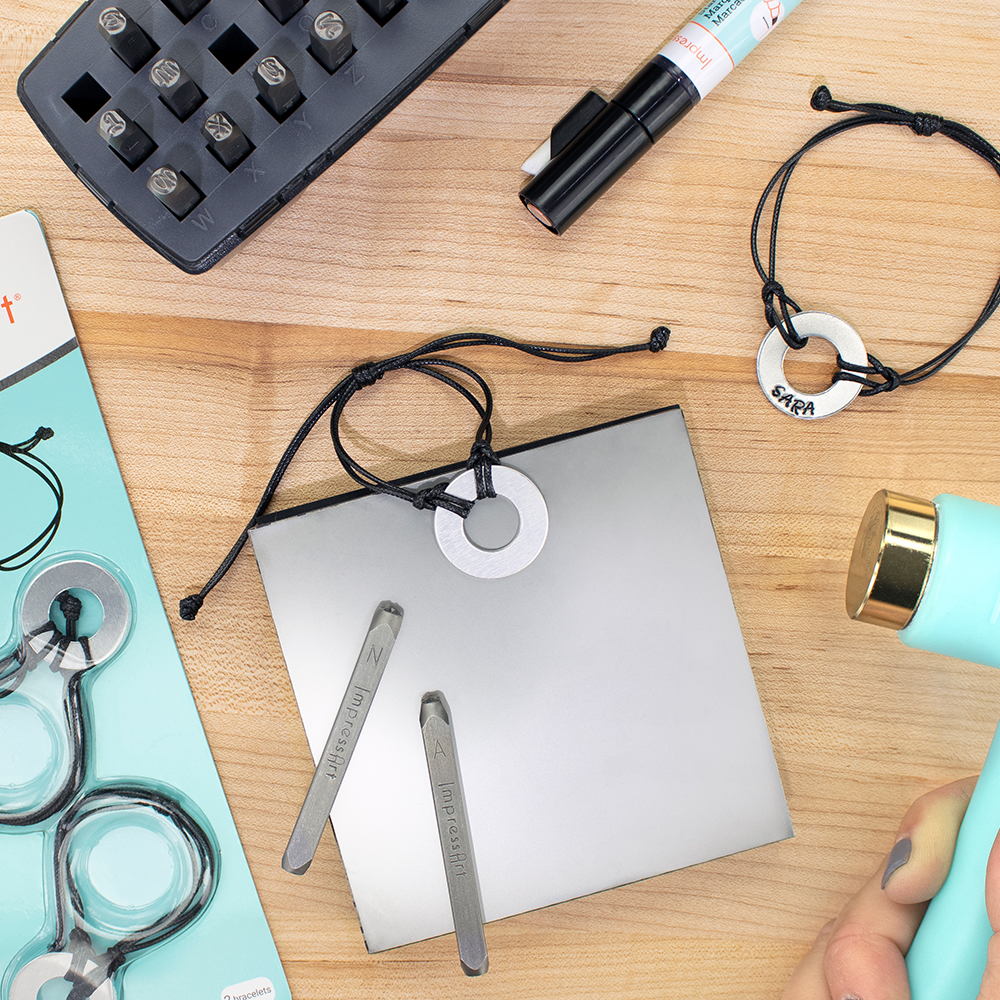
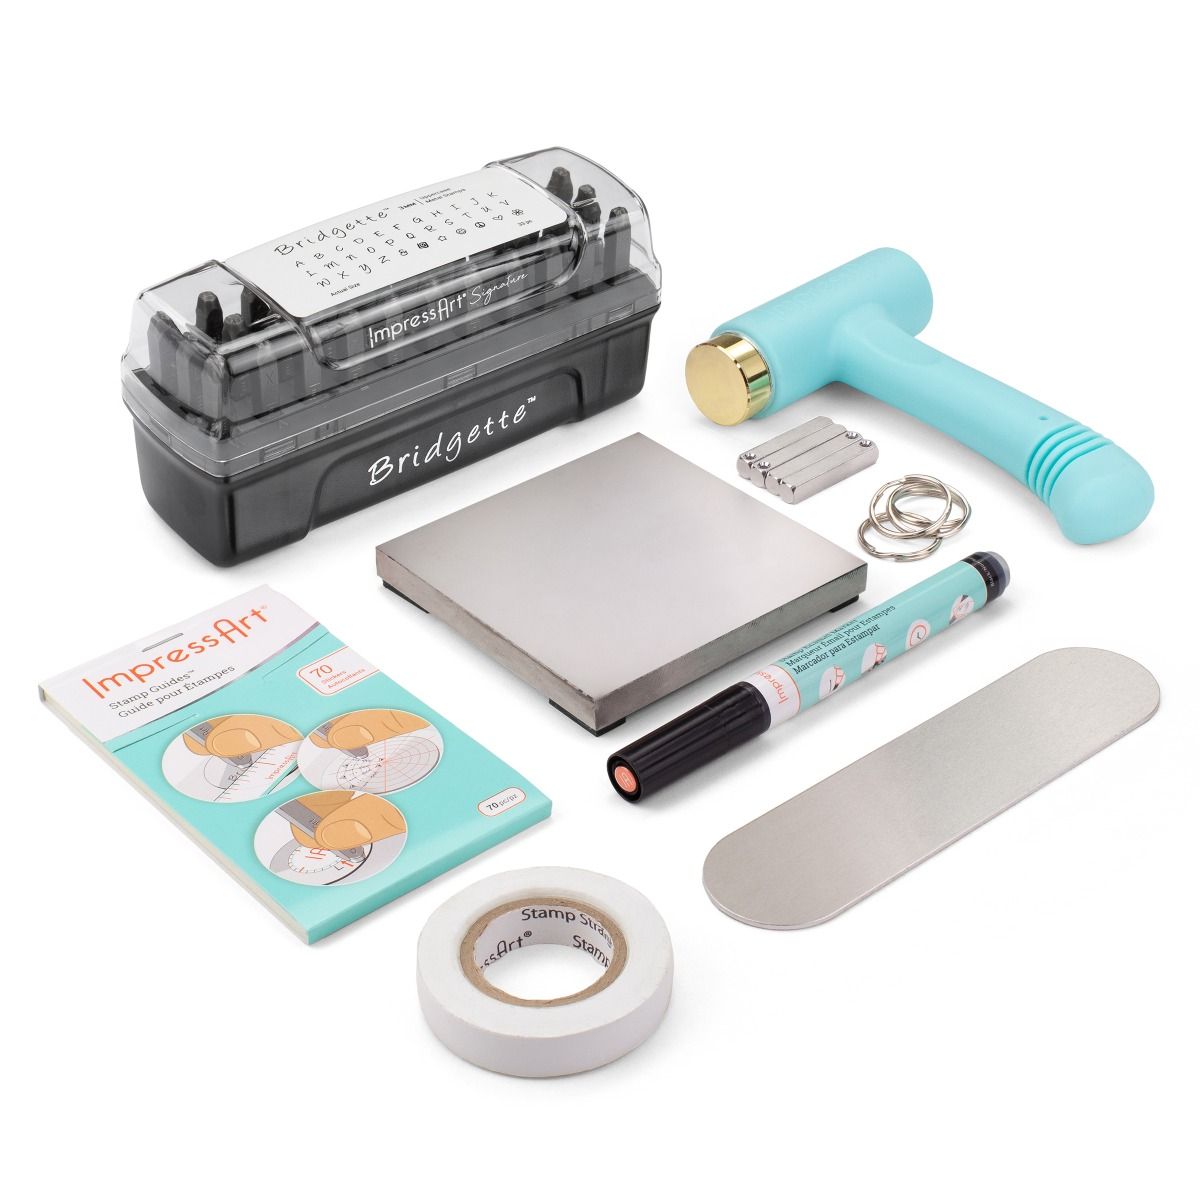
Place cuff link blank on stamping block. Secure straight stamp guide on blank. Use guide marks to evenly space out letters and align stamp impressions.
TIP: Use stamp tape to secure the cuff link blank to the stamping block so it doesn’t move while stamping.
TIP: Write desired message directly onto the stamp guide and utilize the guideline marks for spacing.
Place stamp on blank, above the corresponding mark on the stamp guide. Lightly drag stamp towards the guide until the stamp catches the edge of the guide. Strike the stamp once with medium force using Metal Stamping Hammer. Repeat to complete desired word. Remove stamp guide. Stamp the remaining cuff link blank to make a complementary stamped pair of cuff links.
TIP: If the stamp has an ImpressArt logo, make sure it is facing you so that the impression is stamped in the correct direction.
TIP: Slightly tilt the stamp towards you while dragging the stamp towards the guide. Make sure you hold the stamp flat and firmly in place before striking the stamp.
NOTE: For lowercase letters g, j, p, q, y: Place bottom of the stamp on the thin horizontal blue line that runs through the guide marks.
Highlight impressions with Stamp Enamel. Wait 3-5 minutes and then dab the excess enamel into the impressions with a paper towel before lightly wiping it away from the surface of the blanks.
Use the double-sided adhesive sticker that comes with the kit to adhere the stamped blanks inside each cuff link.

Pawsitively Safe
Step 1
Place pet tag on stamping block. Secure straight stamp guide on pet tag. Use guide marks to evenly space out letters and align stamp impressions.
TIP: Use stamp tape to secure the pet tag to the stamping block so it doesn’t move while stamping.
TIP: Write desired message directly onto the stamp guide and utilize the guideline marks for spacing.
Place stamp on pet tag, above the corresponding mark on the stamp guide. Lightly drag stamp towards the guide until the stamp catches the edge of the guide. Strike the stamp once with medium force using Metal Stamping Hammer. Repeat to complete desired word. Remove stamp guide. Move the straight stamp guide down and repeat the technique to finish stamping any additional lines.
TIP: If the stamp has an ImpressArt logo, make sure it is facing you so that the impression is stamped in the correct direction.
TIP: Slightly tilt the stamp towards you while dragging the stamp towards the guide. Make sure you hold the stamp flat and firmly in place before striking the stamp.
NOTE: For lowercase letters g, j, p, q, y: Place bottom of the stamp on the thin horizontal blue line that runs through the guide marks.
TIP: If the stamp guide becomes unusable due to rips or markings, then use a new straight stamp guide to complete the project.
Highlight impressions and paw print detail with Stamp Enamel Marker. Wait 3-5 minutes and then dab the excess enamel into the impressions with a paper towel before lightly wiping it away from the surface of the pet tag.
Connect split ring to the stamped pet tag. Lift up the end of the split ring with your fingernail. Slide pet tag onto the split ring. Rotate the split ring until the pet tag is attached.
Attach pet tag to collar.
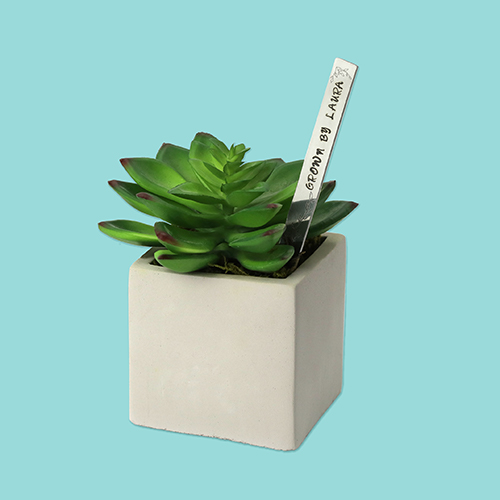
I Will Survive
Step 1
Place garden marker on stamping block. Secure straight stamp guide on garden marker. Use guide marks to evenly space out letters and align stamp impressions.
TIP: Use stamp tape to secure the bottle opener to the stamping block so it doesn’t move while stamping.
TIP: Write desired message directly onto the stamp guide and utilize the guideline marks for spacing.
Place stamp on garden marker, above the corresponding mark on the stamp guide. Lightly drag stamp towards the guide until the stamp catches the edge of the guide. Strike the stamp once with medium force using Metal Stamping Hammer. Repeat to complete desired word. Remove stamp guide.
TIP: If the stamp has an ImpressArt logo, make sure it is facing you so that the impression is stamped in the correct direction.
TIP: Slightly tilt the stamp towards you while dragging the stamp towards the guide. Make sure you hold the stamp flat and firmly in place before striking the stamp.
NOTE: For lowercase letters g, j, p, q, y: Place bottom of the stamp on the thin horizontal blue line that runs through the guide marks.
Highlight impressions and vine design with Stamp Enamel Marker. Wait 3-5 minutes and then dab the excess enamel into the impressions with a paper towel before lightly wiping it away from the surface of the garden marker.

Sorry, I'm Booked
Step 1
Place bookmark on stamping block. Secure straight stamp guide on bookmark. Use guide marks to evenly space out letters and align stamp impressions.
TIP: Use stamp tape to secure the bookmark to the stamping block so it doesn’t move while stamping.
TIP: Write desired message directly onto the stamp guide and utilize the guideline marks for spacing.
Place stamp on bookmark, above the corresponding mark on the stamp guide. Lightly drag stamp towards the guide until the stamp catches the edge of the guide. Strike the stamp once with medium force using Metal Stamping Hammer. Repeat to complete desired word. Remove stamp guide.
TIP: If the stamp has an ImpressArt logo, make sure it is facing you so that the impression is stamped in the correct direction.
TIP: Slightly tilt the stamp towards you while dragging the stamp towards the guide. Make sure you hold the stamp flat and firmly in place before striking the stamp.
NOTE: For lowercase letters g, j, p, q, y: Place bottom of the stamp on the thin horizontal blue line that runs through the guide marks.
Highlight impressions and LineDot design with Stamp Enamel. Wait 3-5 minutes and then dab the excess enamel into the impressions with a paper towel before lightly wiping it away from the surface of the bookmark.
Attach a ribbon to the bookmark using a Lark’s Head Knot. Fold the length of the ribbon in half at the center. Take the fold and slide it through the hole in the bookmark. Take the two ends of the ribbon and pass them through the loop made by the fold of the ribbon. Pull tight to secure ribbon to the bookmark.
All Level 1 Projects