

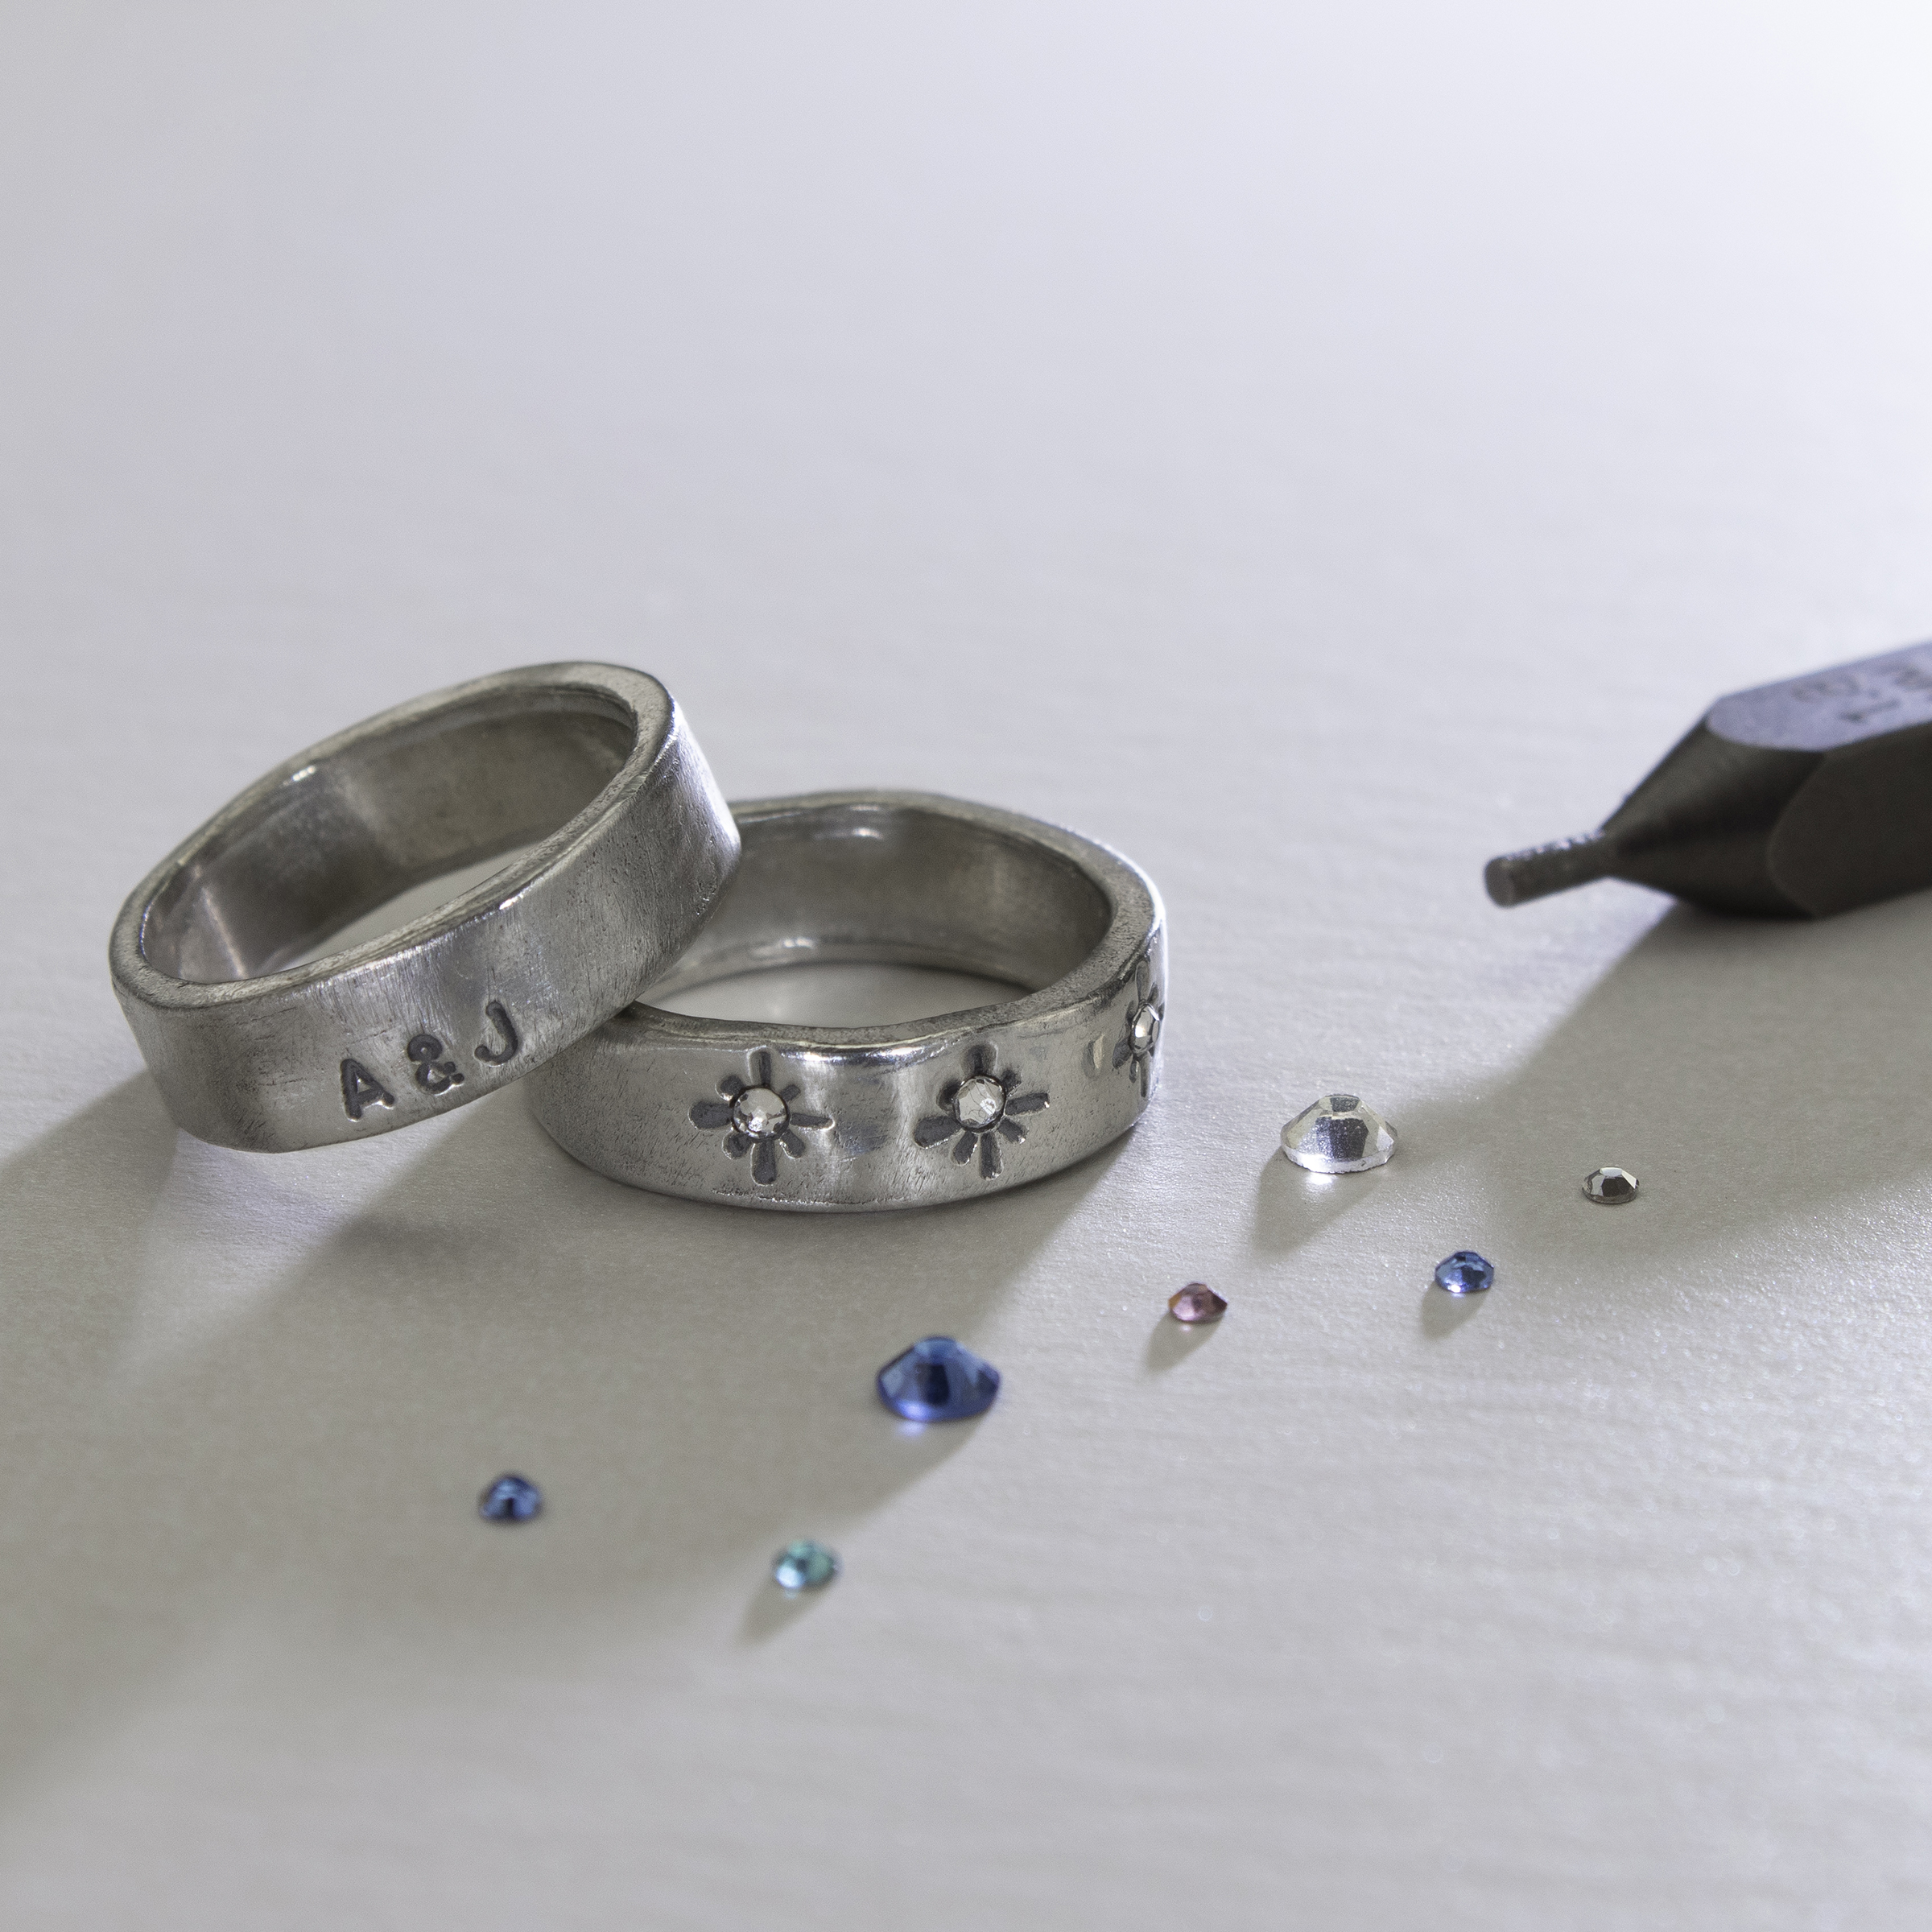
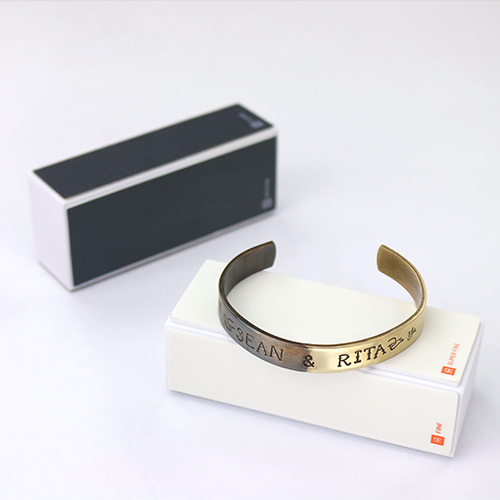
Twinkle & Shine
SKILL LEVEL : Advanced
Twinkle and shine like the brightest star in the night sky!
Create out-of-this-world jewelry by stamping on solid pewter pre-formed rings! Hand stamping pre-formed rings is an advanced technique, but with a little patience and practice, your hand-stamped pieces will shine like the stars in the sky.

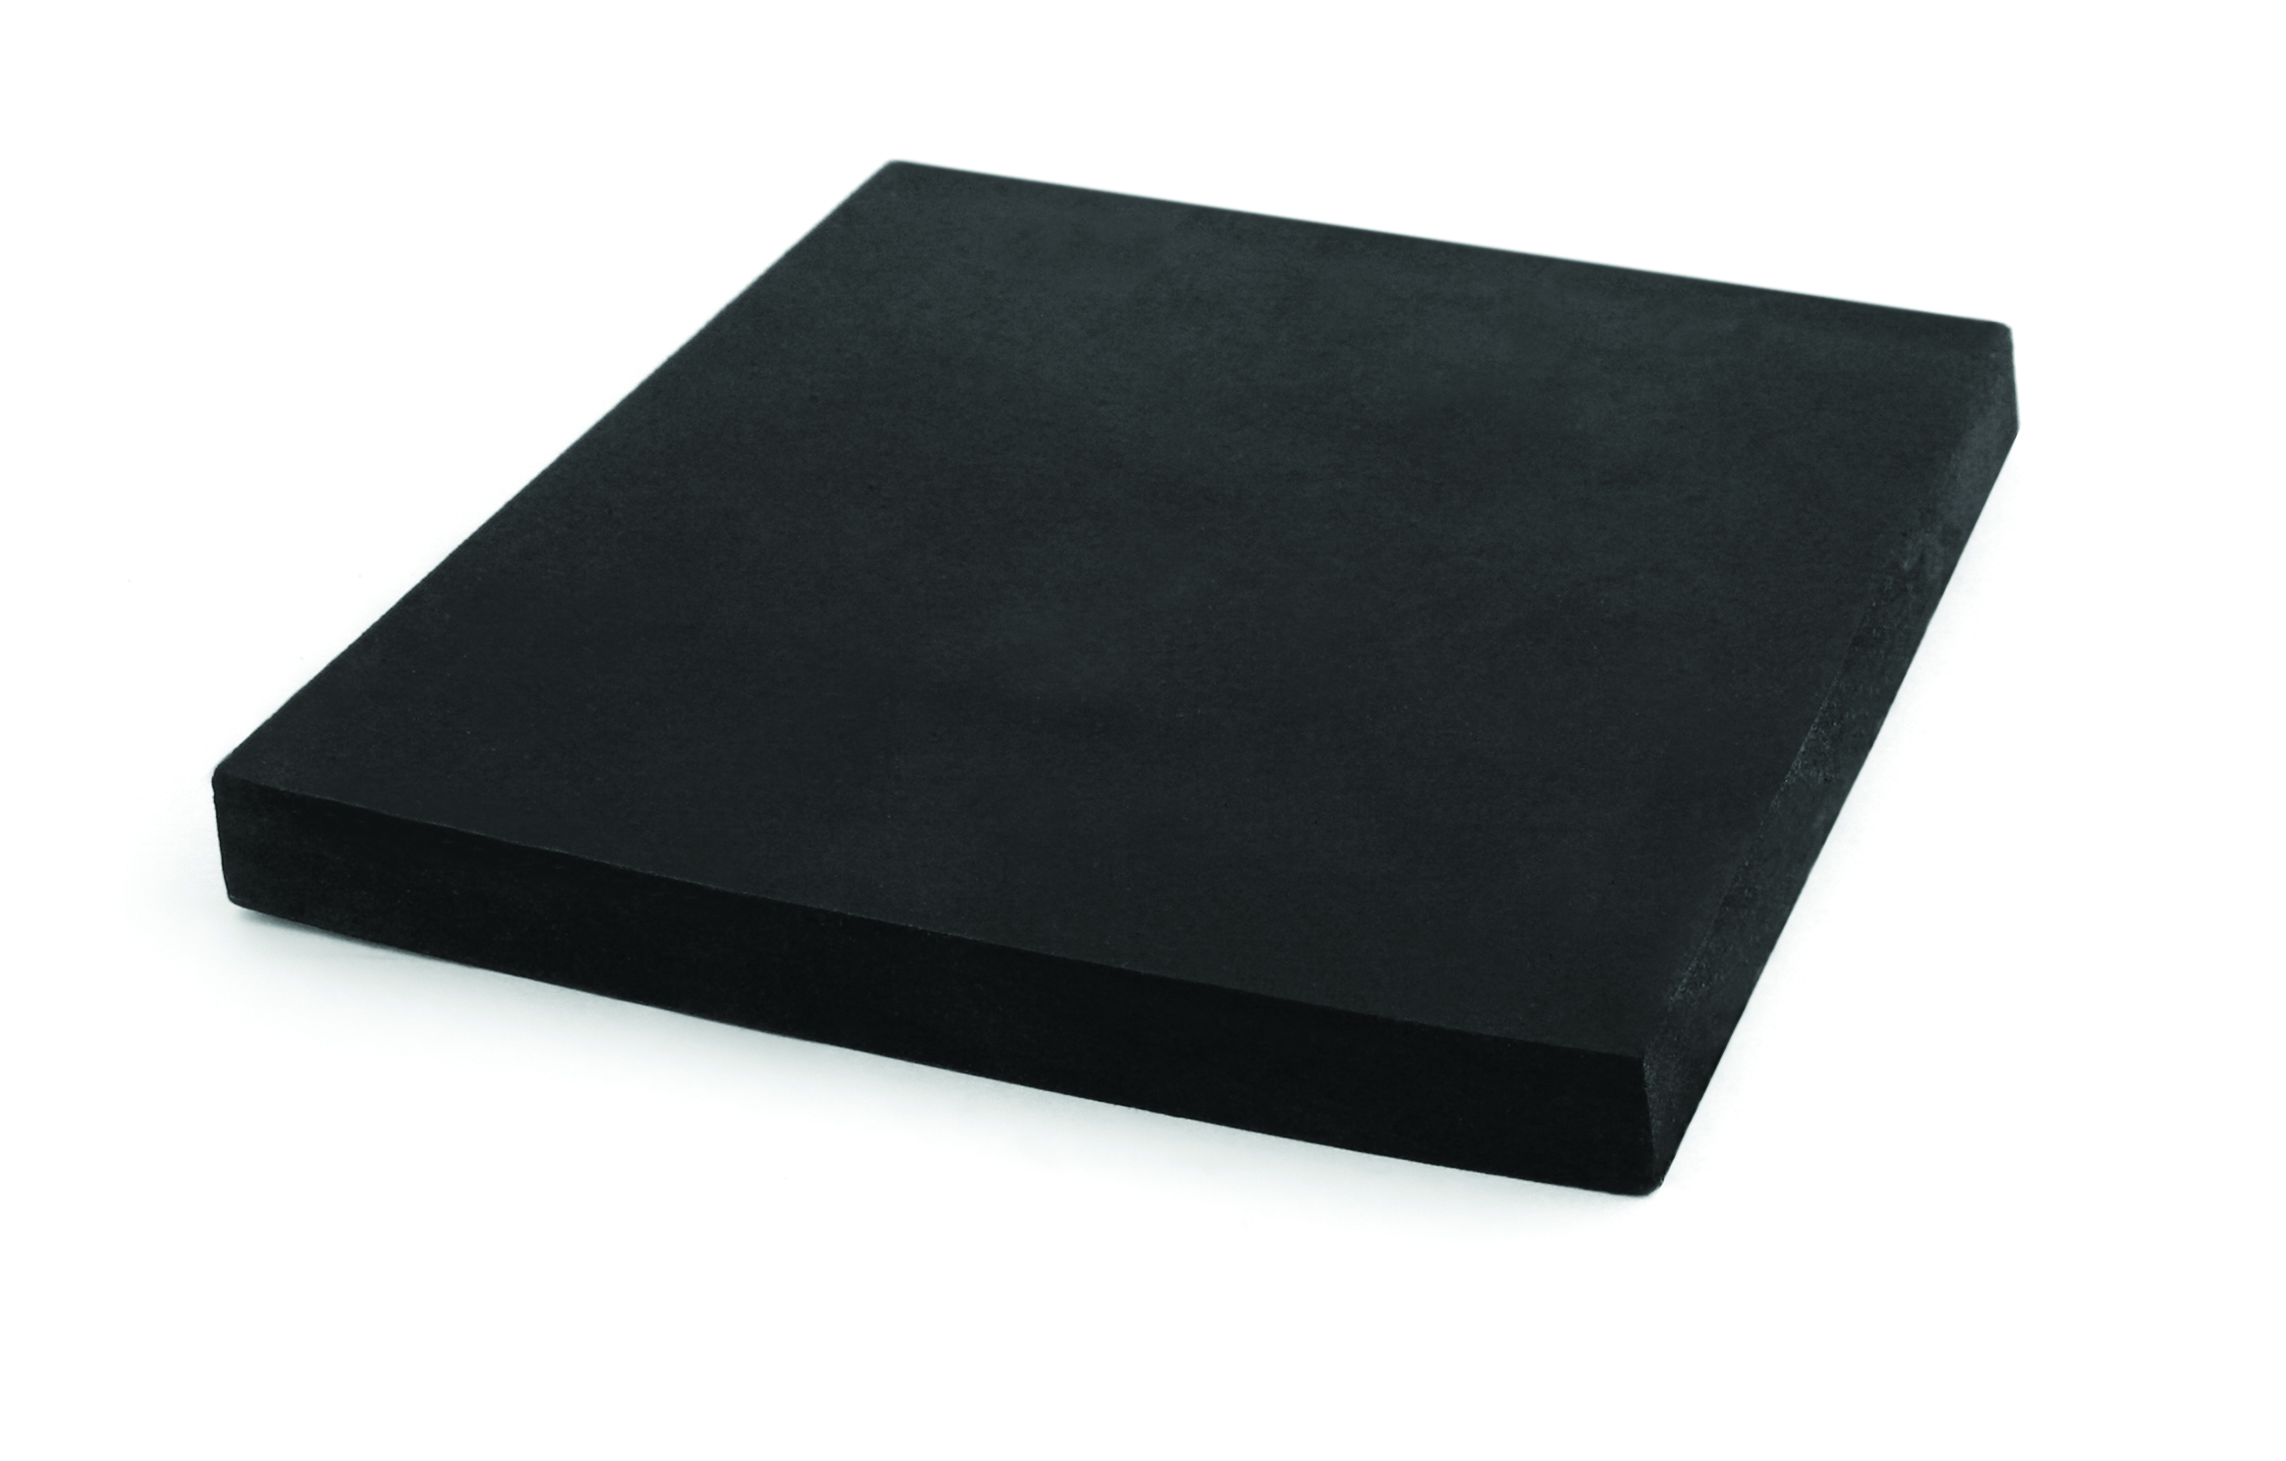

Slide pre-formed ring on steel mandrel until it’s secured in place. Then position mandrel on top of rubber bench block or sandbag.
Note: To stamp on a pre-form ring, a steel ring mandrel is needed (this will act like a steel block) with a rubber bench pad or sandbag underneath to keep the mandrel from not rolling around. Stamping on pre-formed rings is an advanced technique and takes some practice.
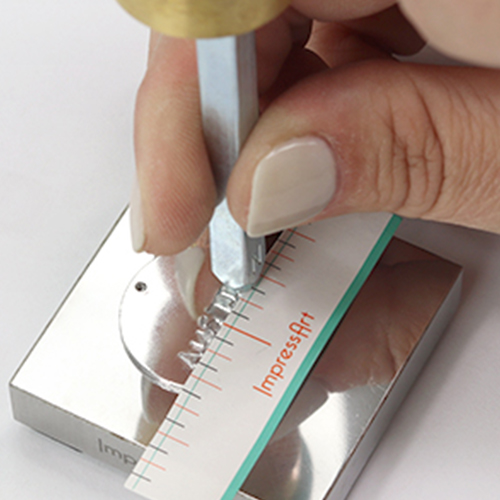
Secure straight stamp guide on the pre-formed ring. Cut stamp guide into smaller pieces for a better fit. Use guide marks to evenly space out letters and align stamp impressions.
TIP: Write desired message directly onto the stamp guide and utilize the guideline marks for spacing.
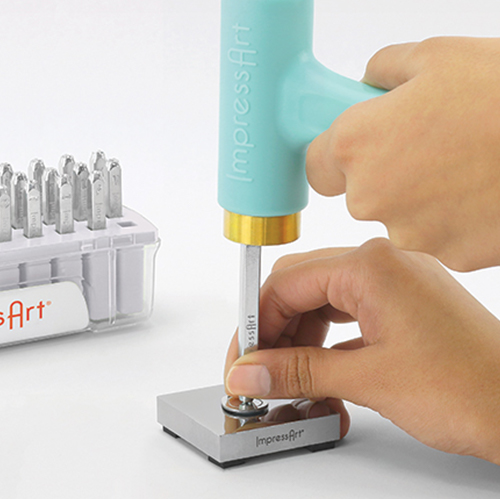
While holding the ring and mandrel steady, place stamp on the blank, above the corresponding mark on the stamp guide. Lightly drag stamp towards the guide until the stamp catches the edge of the guide. Hold stamp as well as the pre-formed ring flat and firmly in place by applying pressure and anchoring the side of your hand on workspace. Then strike the stamp once with medium force using Metal Stamping Hammer. Repeat to complete desired word. Remove stamp guide.
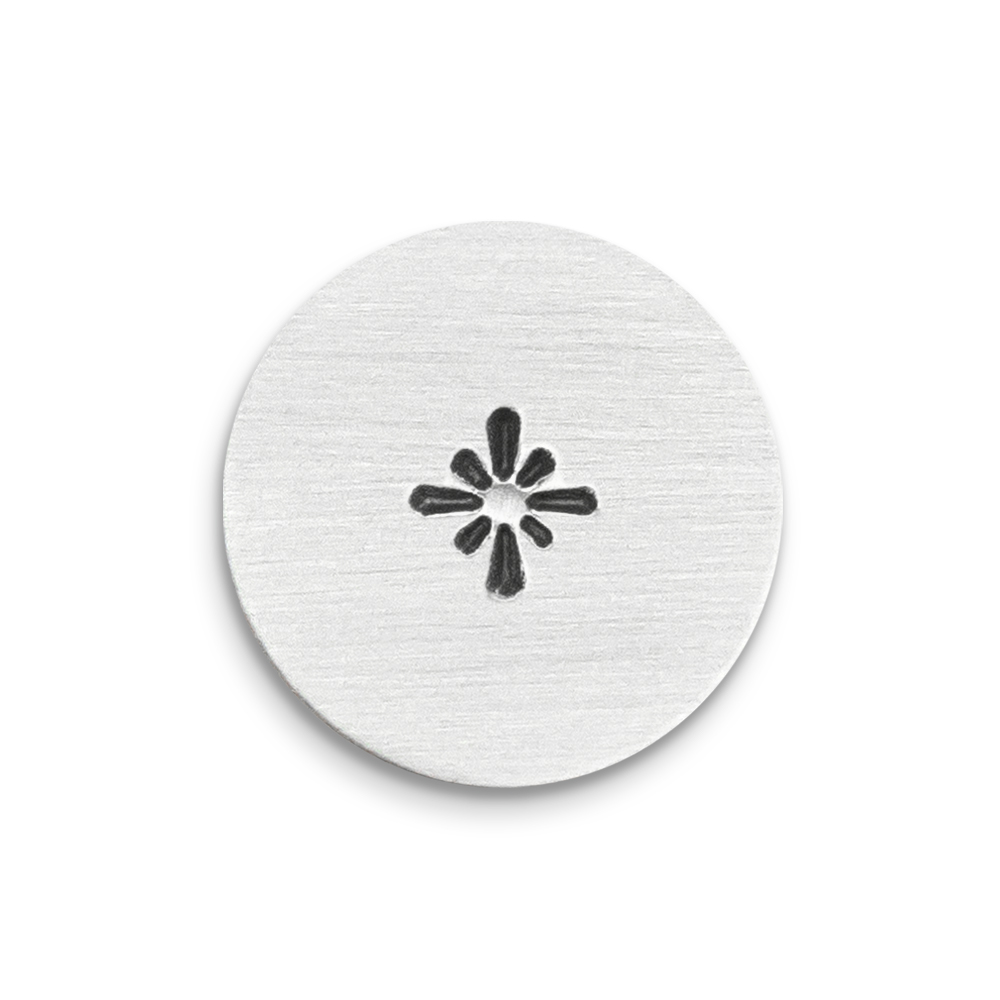
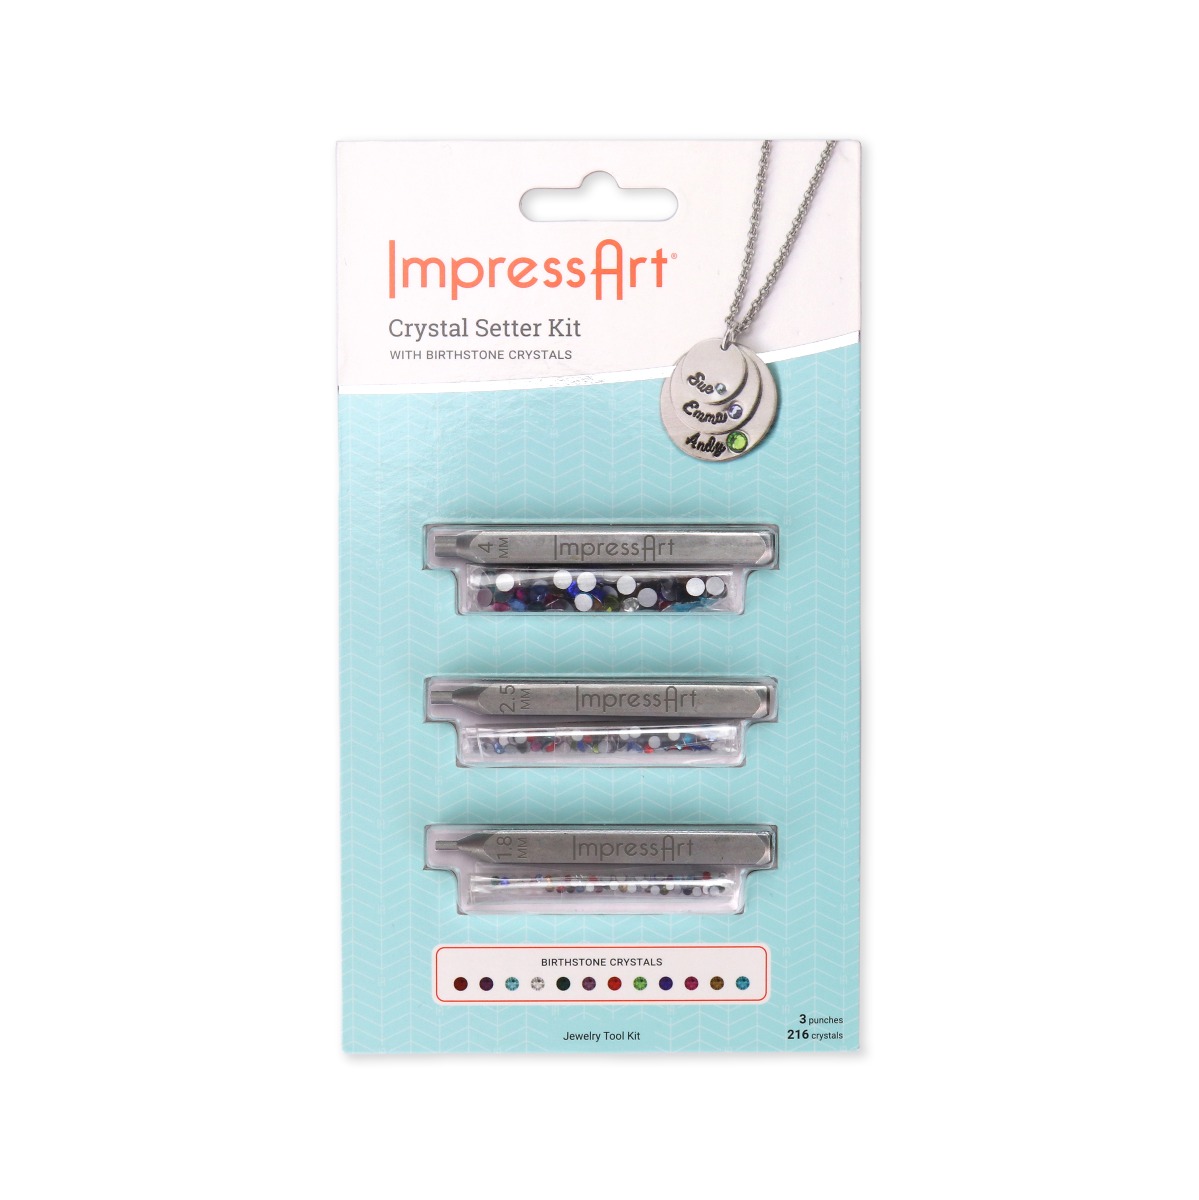
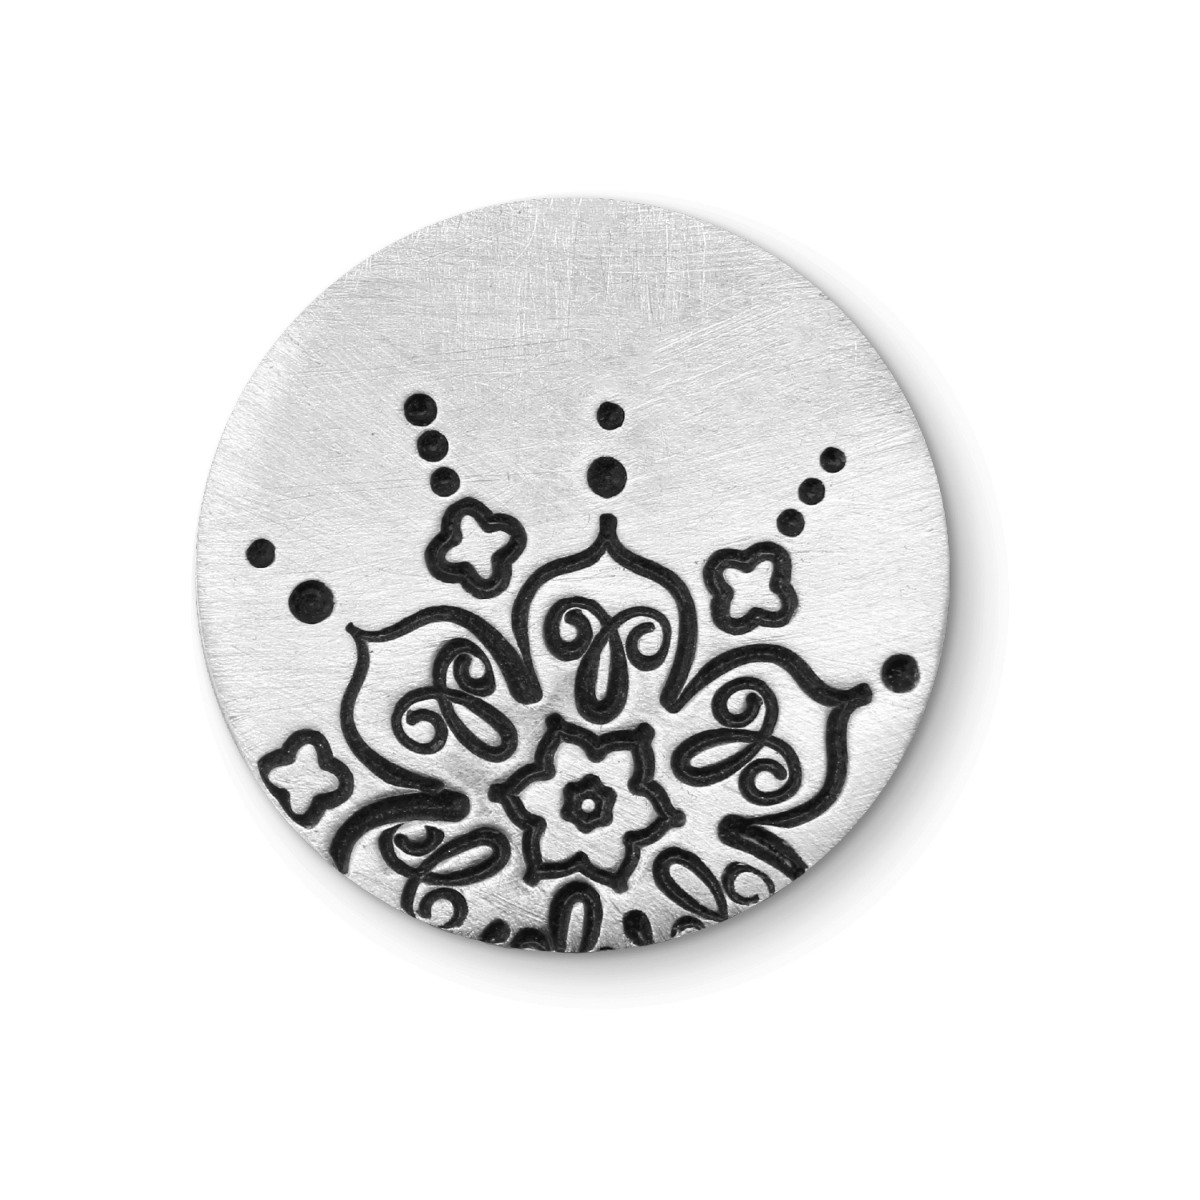
For a spark of color, stamp the center of each twilight halo impression with the crystal setter.
Hold crystal setter flat and firmly in place on the pre-formed ring. Strike with medium force using metal stamping hammer until a round indentation is formed in the stamping blank. The indentation should be deep enough so that the edges of the crystal are set in the divot and the top of the crystal protrudes out from the blank. Slide ring off steel mandrel.
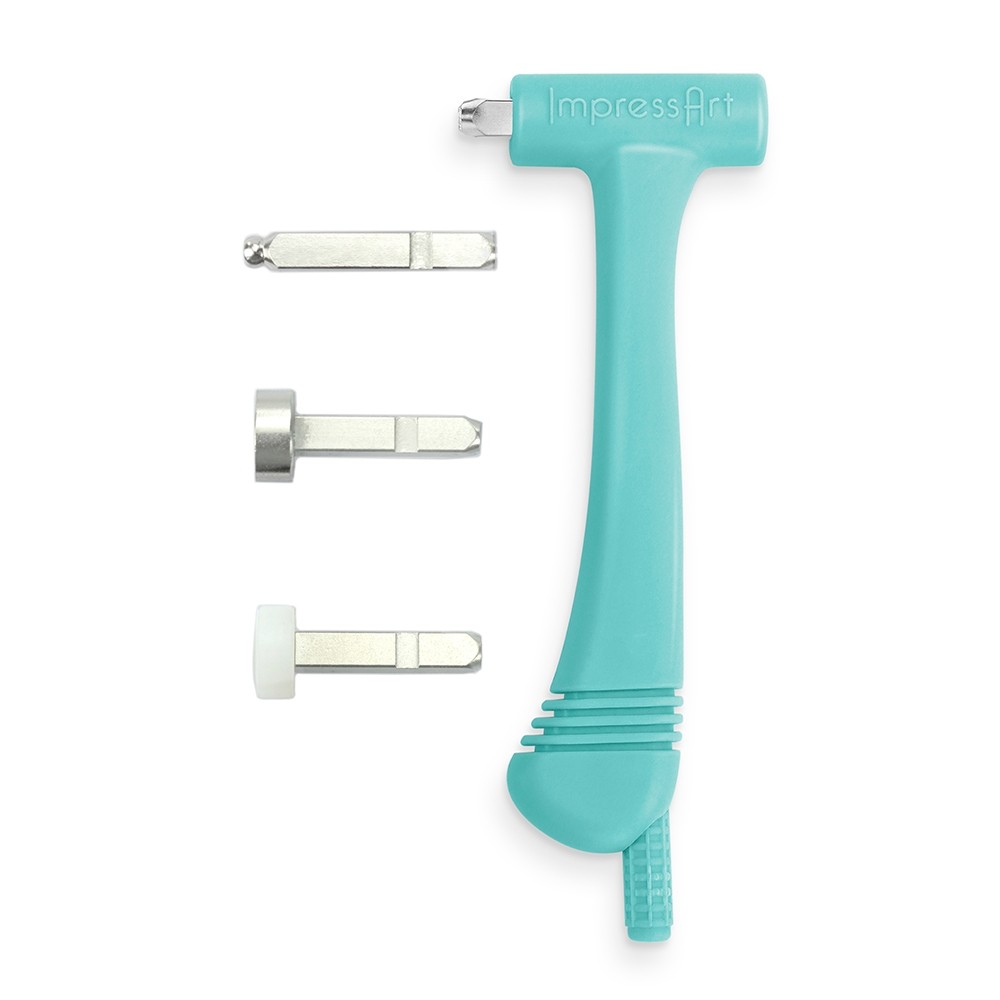
Place chasing texture stamp in the Multi-Function Hammer, with the notch in the stamp facing down. Secure stamp in the hammer by tightening the screw at the bottom of the hammer.
Set pre-formed ring on stamping block. Hold the hammer with your palm of your hand over the screw. Then while holding the ring in place, tap around the side of the ring to form any bulges back into shape. Flip ring over and repeat.
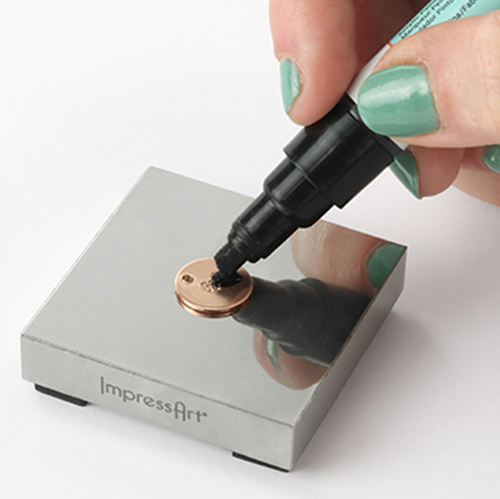
Highlight stamped impressions with Stamp Enamel. Wait 3-5 minutes and then wipe away the excess enamel from the surface of the blank. To create an antiqued oxidized look, repeat enamel process by applying Silver Stamp Enamel over the black enameled impressions.
Buff stamped blank to a brilliant, high-shine finish using High Polish Finish Blocks. Use fine grit to quickly clean and polish blanks. Hold buffing block in the palm of the hand and move the block in even, back and forth strokes to remove dirt and dried enamel left on the raised surfaces. Use extra fine grit for buffing to a high shine. Hold buffing block in the palm of hand and buff in tiny, back and forth strokes with light pressure to get a mirror-like shine.
